My visit to the MIDI HACK

Electronics, Music, Synthesizers

Last May 17-18 I attended to the MIDI HACK, which is by far the coolest Hackathon out there (IMO). Is not that I have been in others, but this one matched perfectly the kind of hacks that I like to make.

I had a great time surrounded by people with the same obsessions as me: music, electronics and computers. The event was great, it had nice food, a lot of drinks, coffee and the most important thing: the aura.

At the beginning I had no idea what I was going to build. So I spend the first three hours moving ideas in my brain and trying to come up with something feasible and not repeated. After looking at my bag I decided to do something that I wanted to do two years back…

I had in my bag a Monotron, a Meeblip and some Arduinos. So I decided to put them together and add some extra sauce by connecting a Raspberry Pi to handle OSC messages.

After some hours I decided to drop the Raspberry Pi because I couldn’t connect it to the Spotify’s  WIFI but it works fine otherwise.


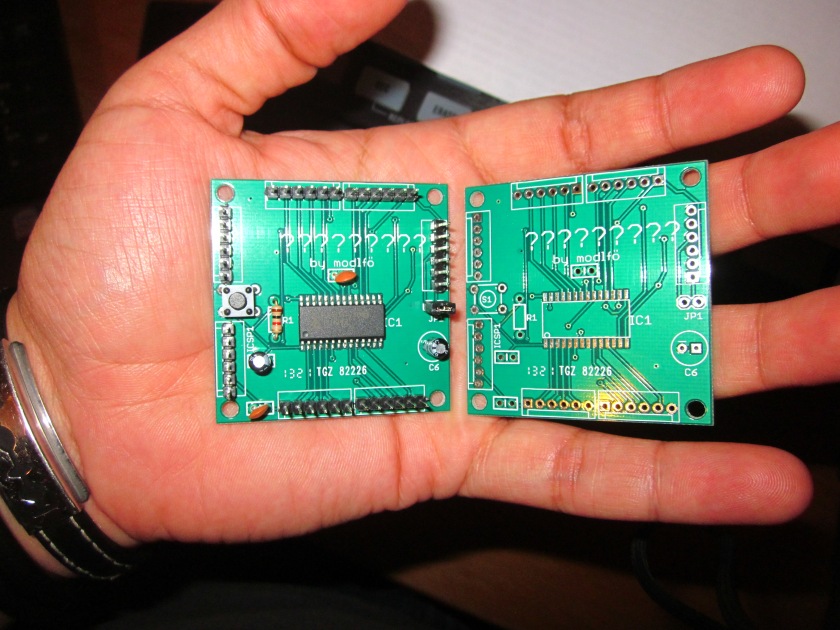
This is a picture of the project:

Monobleep/Meblitron


And this is a more detailed diagram of the connections.

Diagram

So, The RPi runs Node.js and connects to the Arduinos by using the Arduino Firmata. One of the Arduinos sends CV signals to the Monotron in order to control the gate, pitch and cutoff. The second Arduino connects to a custom-made board containing knobs, buttons and LEDs.

The Meeblip is connected by using a standard USB to MIDI converter. The audio of the Meeblip is fed into the Monotron and it uses a potentiometer to control the amount of audio.

The custom controller is used to adjust a few of the parameters of the Meeblip.

Here you can find the code that runs in the RPi.

https://github.com/modlfo/monobleep-meeblitron

And here is the entry to the hackathon http://www.hackathon.io/29648

MicroBruto: a Max For Live simplesizer

Create, Music, Synthesizers

I have been watching demos and reviews of the Arturia MicroBrute and it seems like a very interesting synthesizer. It’s analog, cheap and flexible. But before even thinking about getting one, I wanted to “experience” the user interface. That’s why I decided to make the MicroBruto. ‘Bruto’ in Spanish can be translated as gross or stupid, but I have to clarify that the name does not reflects my option about the synthesizer. I just thought it was funny.


Arturia MicroBrute

Arturia MicroBrute

The MicroBruto

The MicroBruto is not an emulation, is just a digital synthesizer with controllers inspired by the MicroBrute. I tried to imitate the functions of the oscillator, the envelope, filter, LFO and most important: the modulation matrix.

Here you can see a screenshot:

MicroBruto

MicroBruto

The beauty of this synthesizer is that is does not need a manual. That’s why it is a Simplesizer.

You can get the device from the maxforlive.com page. HERE

HMH Mixer

Create, Projects, Synthesizers

This is an educational project I made to get a better understanding on mixing sound. Mixing is all about hearing but it’s always ok to  get a little help from the eyes; that’s the place of spectrum analyzers.  When mixing two sounds we have to be careful on how they interact with  each other in frequency domain. A bad mix may have moments in which certain frequencies get to loud or where one sound shadows the presence of other.

Being capable of detecting (and fixing) those problems of a mix requires training and talent. Since I don’t have to much training yet (lets not talk about the talent) I made this program to help me hear. The HMH (Help-Me-Hear) Mixer provides features that can help you in times of doubt. This is a screenshot of the interface:

HMHMix

The HMH Mixer was inspired by the youtube tutorial of dude837: Pfft~ is your friend where he explains the use of the pfft~ object in Max.

The program has can load two audio files (A and B). Use the “Open” button to load your files, and select “Loop” if you want your files to repeat when they end. With the level you can control the volume.

HMHMix_ChannelsWhen playing the files you can see a spectrogram of both files where the “x” axis is the frequency and “y” is the time.

HMHMix SpectrumBelow the spectograms we have a filter that is applied to channel B only. Later I will explain the purpose of this filter.

HMHMix Filter

At the bottom we have the master section where we can start reproducing the sounds and see the spectrogram of the mixed signals.

HMHMix FMaster

The master signal has 4 different play modes:

A+B Mix

This mode mixes the A and B sounds. What you hear is simply the sum of the sounds.

Overlap

In this mode the magic starts happening. This mode is controlled by the “Threshold” slider. Set it as low as possible and increase it gradually. As you increase it you will hear only the frequencies that the two sounds have in common. The first frequencies that are heard are the ones that once overlapped are above the threshold. These frequencies are the ones that overlap and have a high volume. If you play a kick drum and a bass, you will hear how they interfere specially in the low end. This is what we have to prevent when mixing.

Using the spectrogram we can determine if there are specific moments in which the overlap is higher.

B Auto

This mode uses the amplitude of the frequencies that overlap and applies a reduction (filtering) of the signal B. This acts as a frequency compressor. The reduction is controlled by the “Reduction” slider, the higher it is the more that the overlapped frequencies are taken from the B signal.

This is interesting because you can hear how the signal B need to filtered in order to reduce the overlapped frequencies.

A+B Auto

In this mode you can hear the signal of “B Auto” mixed with the channel A. This would be a kind of “very good blend” of the two sounds. The xix is not perfect, but listening to this will give you an idea of how it should sound if the common frequencies do not affect too much.

As I mentioned before, you can achieve this results by using a side-chained  frequency compressor. But I think that those kind of plugins would consume a lot of processing power in a DAW (correct me if I’m wrong). I would like to fix the mix problem by using the tools that are already available in my DAW, that are basically compressors and equalizers. That’s the purpose of the Filter in the B channel. I play with the filter in order to reduce the offending frequencies in channel B and reduce the overlapping. So once I have a decent sound using only the filter, I copy the setting of the filter to my DAW.

Feel free to play with the program and let me know if you have any suggestions.

Download

You can download the main Max patch HERE.

For Windows users. You can download an executable HERE

Making an extension board “Extendra”

Electronics, Synthesizers

The problem was very simple: adding more I/O to any of my boards (XMOS, Arduino, ChipKit, etc.) And the solution could have been simple as well: buying a board to do that, like a cheap Arduino clone or any other alternative that I don’t know.

But this time I decided to do the hard (and fun) way. I designed my own board.

I have made other PCB’s before, mostly etched and milled boards, but I never made a manufactured PCB. I decided to do it this way because I found that SeeedStudio sells very affordable PCB’s. So I started reading an Eagle tutorial (I used Altium at the University) and I found very little intuitive. Anyway, there’s a lot information about it and in a few hours I got my design and ordered the PCB.

I made a few mistakes, for example not labeling all the components and connectors. But electrically was correct.

I decided to use a PIC microcontroller the PIC16F1516. Why? because it has many analog inputs, low speed and cheap. However I found a few problems. I wanted to make an SPI Daisy chain, but seems that the PIC produces an interrupt every time a new byte is received and not when the chip is deselected (using the CS pin). The second problem is that the C compiler that Microchip provides for free practically performs no optimization. So if you check the generated assembly code it hurts your eyes. For any future project I will use AVR because they have free tools that are much better.

Apart from that, the board works correctly. I made two versions, one that is configurable using basic command like a Firmata board and other that makes a faster dump of values.

Extendra boards

Extendra boards

Here you can find the code here https://github.com/modlfo/extendra

The next step is connecting it…

My editor for the Meeblip

Projects, Synthesizers

Some time ago I got a Meeblip Micro http://meeblip.com/

Since I got the Micro version, I does not have any controls. However it is possible to control it via MIDI. I made a simple editor using Max 6 and you can get it here:

https://dl.dropboxusercontent.com/u/26650040/meeblip.maxpat

This is a screen shot:

Image

You can use it by installing the Max 6 Runtime (that is free).

The marketing of shiny things

Absurd, Art, Synthesizers

This week I saw on http://www.synthtopia.com/ the following video (that amazingly it has more than 3 million views):

If you don’t want to check it all I’ll give you a small summary. The video presents a new software for making music, in which the marketing was made by professionals that do not have a clue about the music software market. I said professionals because it seems that they are doing a correct campaign. However I think is not really effective.

In that video these guys present a simple and affordable solution that will help you make good music. They claim that is so easy that you don’t need to study music theory, learn complicated stuff o buy expensive gear… and the weirdest thing is that they say that your friends will envy you…

Guys of Dr. Drum, I have to tell you that when I buy software or hardware I search exactly for the opposite.

I don’t like shiny things,  I like it dirty.

We love complex stuff, we love learning.

That’s one of my principles. That’s what I pray every morning.

Music software and hardware is complex by nature. It’s mysterious and intriguing, but is friendly. Even the simplest machine plays an important role. For example this AB Switch pedal.

It’s function is to route the guitar signal to two different destinations. It’s easy to use and it allows doing amazing stuff.

When I see one of these images I start drooling…

These images are pure beauty.. these are machines of controlled chaos…

I think that all the music is chaotic, and harmony it’s just a piece of it that our senses got used to.

The perfect balance

Ernst Nathorst-Böös nailed it with Reason. In this talk he mentions the key point of a music software.  The software needs to be simple but still having a level of complexity.

We need to feel that every song, every sound we make is our own sound.

Even if my songs are crap they are still my crap and I’m happy. That’s why I can spend long hours preparing a sound.

In the chaos I can let myself go…

BTW. The Reason screenshot is one of my songs.

Developing Pure data externals in Visual Studio

Create, Music, Synthesizers

Some weeks ago I started learning Pure Data. I have known it for a long  time but I never used it since I made my music in other tools.

During the years I have seen amazing stuff  made using PD.  You can create 3D graphics, connect it with Arduino,  using OSC protocol and many more thing.

Connecting blocks with PD is very easy and the combination of text and wires makes it very effective. For example if you want to make a simple block that adds a constant to a signal you just need to type “+ 2″… amazing isn’t it?

In my case, PD is great to prototype and test algorithms, and the fact that you can create your own blocks using C language is great.

I was checking the developer documentation and the tutorials to create extensions. This one was very useful to understand how  the things work.

HOWTO write an External for puredata

However this document is platform independent  and I wasn’t sure what I needed to create and extension using Visual Studio. For that reason I made this small tutorial.

Compiling the hello world example.

The “HOWTO write an External for puredata”  contains the following code:

helloworld.c


#include "m_pd.h"

static t_class *helloworld_class;

typedef struct _helloworld {
 t_object x_obj;
} t_helloworld;

void helloworld_bang(t_helloworld *x)
{
 post("Hello world !!");
}

void *helloworld_new(void)
{
 t_helloworld *x = (t_helloworld *)pd_new(helloworld_class);

return (void *)x;
}

void helloworld_setup(void) {
 helloworld_class = class_new(gensym("helloworld"),
 (t_newmethod)helloworld_new,
 0, sizeof(t_helloworld),
 CLASS_DEFAULT, 0);
 class_addbang(helloworld_class, helloworld_bang);
}

Just put the code in a file named “helloword.c”.

In order to simplify the project creation I used CMake. Download the latest version and install it. Note: I have added the path to the binaries to the PATH variable.

You need to create the following two files.

helloworld.def


LIBRARY helloworld
EXPORTS helloworld_setup

This file is to let know the compiler that we are exporting the symbol “helloworld_setup”. The following file is the cmake project file. This one is going to make most of the magic.

CMakeList.txt


project(helloworld)

add_definitions(-DMSW)

set(SRC helloworld.c)

include_directories("C:/Program Files (x86)/pd/include")
link_directories("C:/Program Files (x86)/pd/bin")

add_library(helloworld SHARED ${SRC} helloworld.def)

target_link_libraries (helloworld pd)

Generating the project files

CMake files are very simple to understand, you define the sources (line 5), you add the includes and libraries directories (lines 7 and 8). The includes and the libraries are located in the folder of your PD-extended installation.  In line 10 we define that we are creating a shared library using the sources in variable SRC  and we also supply the helloworld.def file.

The new step is to open the command line. Note: you need to able of calling the compiler (cl.exe) from the command line. For that reason I use the shortcut included in the Visual Studio tools menu.

Once in the command line, go to the path where you have the files located and run the following command to generate the project files for Visual Studio 2010:  cmake ./ -G “Visual Studio 10”.  This will generate all the project files you need.

If you have problems following these steps, you can also refer to the cmake tutorial in HERE

Compiling and debugging your extension

Compiling is straight forward. Open the “ALLBUILD” project in visual studio and build the solution.

In order to debug you new extension you need to make it like any other DLL. You need to make PD use the DLL and attach the debugger. To use the DLL in PD you need to add the path to your debug DLL. You can find where the DLL is by looking at the project properties.

To add the path into PD go to File->Path menu and add a new entry.

After that you need to tell PD to load the DLL when it starts. In the menu File->Startup add the “helloworld” entry.

The next step is to configure the debugger. Since we are compiling a DLL we need to to configure the debugger to run PD instead. In the Properties of the helloworld project, in the debugging tab set the “Command” to the path of pd.exe and preferably the working directory to the same path.

Now just add a breakpoint, run the debugger and see it stop when you’re using your extension.

Hope this small tutorial simplify some steps for you. I’m planning to make a few more explaining other aspects.

My impressions about the iOS and music apps

Music, Synthesizers

During the past weeks my brain has been suffering a transformation due to the use of my new iPod (yes, I’m exaggerating).

The first thing that I did It was to configure my emails. And now easier than ever I can check all mi accounts in less than 20 seconds. Before I used to spent at least 7 minutes waiting for the laptop to start just to check my once my email. Now I check my email a few dozen times a day… I even read the spam…

Advantages and disadvantages… actually It was very cool that I didn’t had to carry my netbook during my last trip because I could check emails, maps, and touristic information in the iPod.

The frustration

Since I’m a developer there are many ideas that I have of possible apps that I could create. The bad thing is that I just can’t. First I don’t have a mac, therefore I cannot use the development tools 😦 … and even when I have a mac, I need to pay 100 bucks (a year) if I want to transfer my app to my iPod.

Until I get the money for that, I just can consume but not create.

My opinion on (a few) music apps

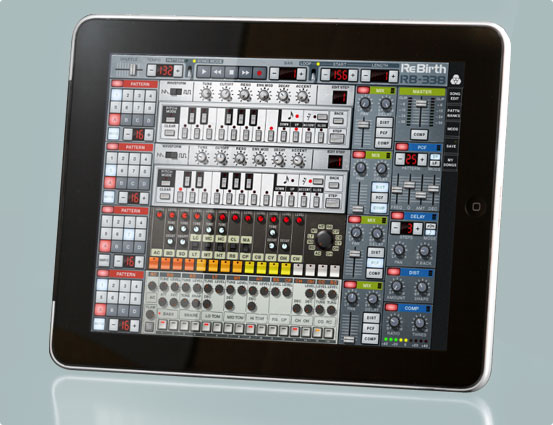
The first App that I downloaded was Rebirth (before Figure was out). I got it because Propellerheads makes Reason that is a great and easy to use program. I could say that using Rebirth in the iPod was a little bit disappointing. Since it was an a adaptation of the PC version, it was hard to use in a small touch screen.

Then I got iKaossilator from Korg

I really like this app. It is very easy to use and fun. Since it is like drawing, you can let your subconscious mind trace the music patterns.

I hope they upgrade the application by letting us add our own instruments… and a grid would be useful too.

The next application in  my list is Thumbjam.

This app sounds great and it is very easy to create expressive  parts. It has so many features that I haven’t explored all of them. Maybe the menus are not well designed but it is a great app. I specially like the sound of the acoustic instruments.

One of the apps that I use more often is iMaschine

This app has a very good balance among, features, sound and simplicity. Today this is my favorite (lets see how Figure evolves).

There are other apps that I like a lot, specially when using a MIDI input like iRig MIDI or Line6 MIDI Mobilizer. Animoo and Alchemy Mobile have very cool sounds and I specially like the way yo can manipulate the sound thanks to the touch screen. I use these apps more as instruments, but it would be great if I could assign the knobs of my MIDI controller to tweak parameters.

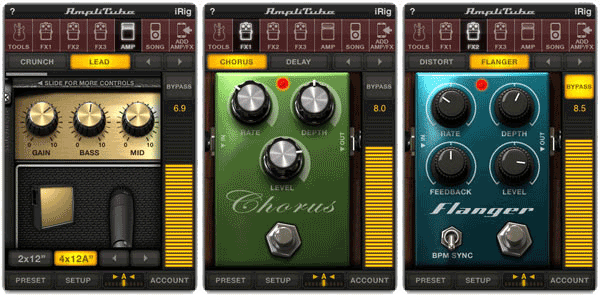
Amplitube is a nice app, the sound is good taking into consideration that it is using the iPod to simulate the effects, amp, cabinet and microphone. However it has one disadvantage for me… if I have my guitar I also have my POD HD300 that sounds by far better. I never travel carrying mi guitar, therefore I almost never use it.

 The full music studio in an iPod

There are very nice apps like Garageband, FL Studio Mobile, Nano Studio and Energy XT. These apps have very cool features, however, I think that the iPod/iPhone is too small and sometimes it feels slow for the task. I guess that in the new iPad these apps have more sense…

Maybe it just needs a little bit of help… things like the MPC Fly for the iPad seem very promising…

We just need to wait a few months to see the revolution.

HackPrism a MIDI controller inspired by SoundPrims

Art, Music, Synthesizers

Last December I had the opportunity to try for the first time an iPad. (Yes I know, I’m a little bit delayed). It was really amazing the number of music apps available. You can find from apps that fart, to complete DAWs. One of my favorite apps was SoundPrism by Audanica.

Soundprism is a software midi controller that simplifies playing chords. I tried it and in a few minutes I was making nice songs. The best part is that, using the iPad, you have the multitouch screen and it feels really natural playing that thing.

There is even a short film in which the music was completely created using SoundPrism: Julie, Agosto, Setembro.

Sadly I don’t have an iPad, and I don’t have any plants to buy one. But still I wanted to be able to use SoundPrism. That’s why I made my own basic version using Processing.

My version is very basic and does not include any of the nice features available in the Pro version of SoundPrism. This is a screen shot:

If you want to use it, you need 5 things:

  1. Processing
  2. “The Midi Bus”  library
  3. LoopBE1 or any other virtual MIDI cable
  4. A software synthesizer or midi instrument
  5. My source code

If you are new in these things, I will guide you step by step.

Go to http://processing.org/ and download processing. I use the 2.0a4 version. I recommend you to download this version since makes very easy the installation of libraries. This is the direct link.

Once is decompressed in your favorite folder, run processing and go to  Sketch->Import Library-> Add Library. Now select and install “the Midi Bus” library and restart processing.

Now you have to install a virtual Midi cable. Since I’m using Windows 7, I recommend LoopBE1. Download it and install it. If you are a Mac or Linux user, there should be some equivalent software but I can’t help you now.

Now we need something to make noises. If you don’t have any program installed, I recommend you Native Instruments Mikro Prism. That is a free plugin that you can run with the Reaktor Player (also free). Once Reaktor player and Mikro Prism are installed you need to be sure that Reaktor can receive MIDI signals from LoopBE1. Go to File->Audio and MIDI settings, in the MIDI tab check that “LoopBE internal MIDI” is ON.

Now you just need my magic source code. you can get it from my public Dropbox folder HERE.

Now prepare everything. Open Processing, open my code. Run Reaktor Player, load Mikro Prism. Press the play button in Processing and you should see HackPrism. Play some notes with the mouse and enjoy.

If you know a little bit programming, you can modify my code and add different scales to play with. Now it is up to you.

If you like it post a comment, and if you have a iPad I encourage you to get the Pro version of SoundPrism.

Mocotron: a Monotron inspired Reaktor instrument

Create, Electronics, Music, Synthesizers

Today I made a small Reaktor instrument based on the Monotron Synth

I really like this small synthesizer because it sounds very natural. I love the analog sound.

This is my version:

You can download it from the Reaktor user library HERE.

This is how the model looks:

I have also uploaded demo sound to Soundcloud, but the MP3 file that I made sounds really crappy.

(Now I know why it is called LAME encoder)